Sunday, May 31, 2015

DIY Friendship Bracelets

This is Not Your Ordinary Friendship Bracelet! 


As the school year is coming to an end, I wanted to do something special for N's teachers to show my appreciation for taking care of her educationally and emotionally all year.  Her teachers made her first year at school amazing! I am very grateful that she has learned a lot and has made some great friendships. 

I asked N if there was something special she wanted to make for her teachers. She said she wanted to make bracelets. We went through all of my beads together and she chose the colors for each teacher. N wanted to give everyone a bracelet, but sadly I had to burst her bubble. I had to tell her we are only making three for her classroom teachers, otherwise we would be making bracelets for the whole school.  After I explained to her the situation, she was excited again to get started.  N also wanted to add charms and add their initials to each bracelet for personalization.

When I was a little girl, I spent hours making friendship bracelets.  I always challenged myself to create new patterns and to see how wide I could make it.  I went through a lot of embroidery floss, so when my mom found my embroidery floss box a couple of years ago, I was surprised to find a good amount left.  Since N developed a great bond with her teachers, I thought an adult version of a friendship bracelet would show them how much we love and appreciate them.

Supplies Needed:

  • Beads of all sizes
  • Embroidery floss
  • Charms
  • Scissors
  • Waxed Linen thread
  • Toggles
  • Safety pins
  • Scrapbook paper or cards
  • Ribbon
  • Hole Punch
  • Sharpie (Colored)


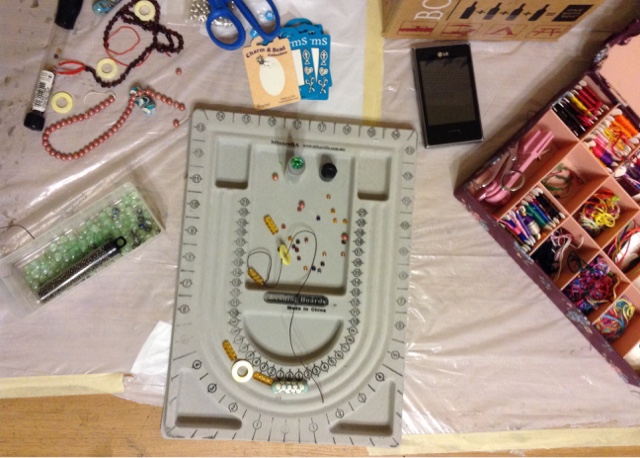
Jewelry Measuring Plate, Embroidery Floss, and Beads of all Sizes


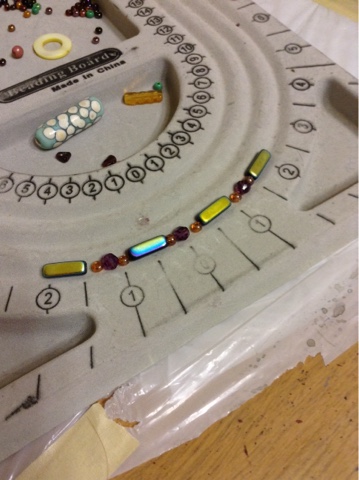
To get started, I placed the beads for the first bracelet on the jewelry measuring plate.  This gave me some sort of idea how the bracelet would look while being worn and how many beads I would want to use.  The average bracelet measurement is about seven inches, so three large beads would be enough for each bracelet. The embroidery floss would be the last to be added.


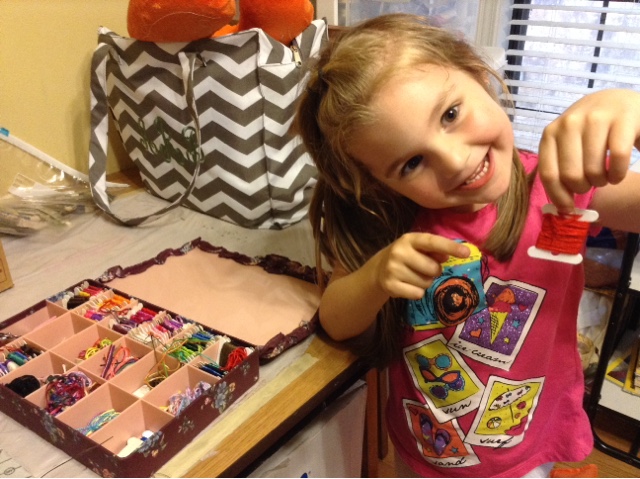
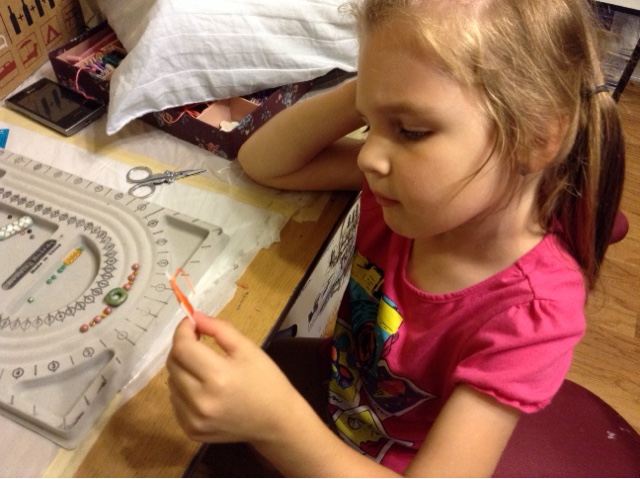
N Picking Out Embroidery Floss


Once N was satisfied about our bead choices, it was time to pick out embroidery floss to match the color scheme of each one.  We chose about four colors per each bracelet.  To get the embroidery floss ready to be cut  I measured an arms length twice for each color. Once the floss was cut into one long piece, I cut it in half.  This will give plenty of thread to work with for either side of the bracelet. Repeat until all colors are cut into two arm lengths.  


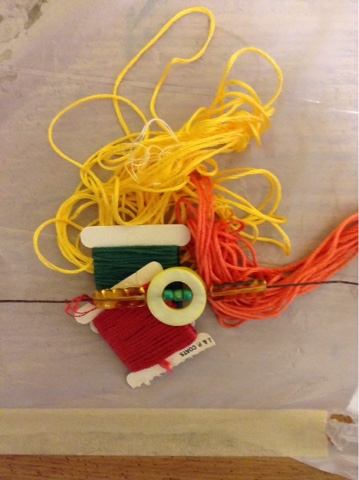
Getting Ready to Add Embroidery Floss


Now it is time to start putting the bracelet together.  Cut the waxed linen to about ten inches.  Add all of the beads to the middle of the waxed linen and set aside. Separate the colored floss into two equal groups.  Tie the floss onto the waxed linen with a double knot while trying to keep the beads in place. Once the embroidery floss is knotted, tie a not in the waxed linen making sure to keep all knots as close together as possible. The knot in the waxed linen will keep the embroidery floss in place, so that the bracelet won't fall apart.  You don't want all your hard work to go to waste.


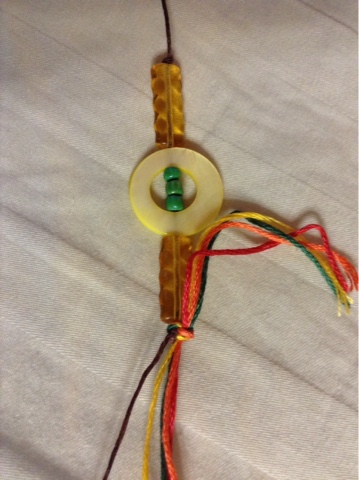
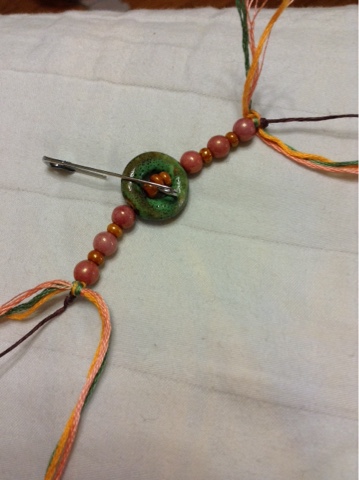
Embroidery Floss Knotted to Wax Linen Thread


Normally, when I am ready to start knotting the embroidery floss, I safety pin the floss to my pant leg right below the knee.  This would allow me to knot on the go or just watch TV.  This time I decided to pin it to my pillow, so I would have more room to work. For these bracelets I decided to repeat a square knot because it uses a lot less floss. Any knot can be used.  Just use whatever is comfortable and unique to what you are making. Once you finish knotting the first side, flip the bracelet to the other side to continue knotting.


Safety Pinning Bracelet to Pillow


Knotting Sides


When I finished knotting the first bracelet, I set it aside. I pulled N over again to repeated the process of getting the beads together and preparing everything else for the next two bracelets. I decided It would be best to finish all three bracelets all at the same time.


N Choosing Floss Colors Again and Beads Are Ready for Second Bracelet


Second Bracelet Ready to Knot


Beads Ready for Third Bracelet


Embroidery Floss Ready to go on Third Bracelet


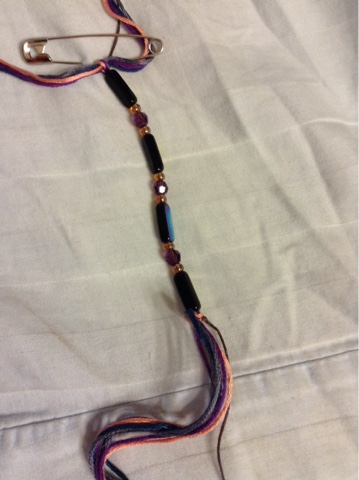
Once all of the knotting was in place, it was time to measure to make sure I had the right length.  I completed the knotting at six inches because the extra bead, charm, and toggle clasp would add the extra inch needed to make a seven inch bracelet. Tie the embroidery floss into a knot and add the bar end of the toggle onto the waxed linen.  Loop waxed linen through, wrap it around itself, and then knot it several times. This is to ensure the bracelet doesn't fall apart.


Yellow Bead Friendship Bracelet Purple Bead Friendship Bracelet 
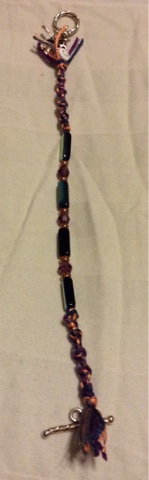
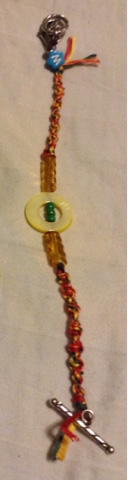
Somehow I only ended up with two photographs of the finished bracelets instead of three. Whooops! Total Bummer!


To finish the other side, tie a knot in the embroidery floss.  Add on the initial bead, charm, and circle part of a he toggle clasp.  Wrap the waxed linen around itself and tie a couple of knots once again to ensure that your bracelet doesn't fall apart.  Cut the waxed linen close to itself so that it's not sticking out. Then trim down the embroidery floss to create a tassel on either side.  Voila! The bracelets are complete.


Yellow Bead Friendship Bracelet Purple Bead Friendship Bracelet Green Bead Friendship Bracelet


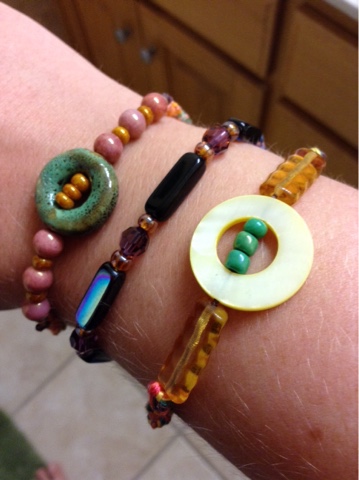
Just Had to Try on For Size


I wanted N to help figure out what kind of card to make to present each bracelet to her teachers.  I let her pick the colored paper she wanted to use.  We discussed what she wanted to say and write on each card.  I wrote it down for her onto notebook paper.  She wrote each letter onto the card with a colored Sharpie marker of her choice.  When she was finished, I punched three small holes along the side with my hole punch.  I punched a hole in the top, middle, and bottom of the side of the card.  To secure the bracelet to the card, I cut three arms length of skinny ribbon.  I weaved the ribbon through the paper and the bracelet. Once it was secure I tied the ends on a knot and cut the excess off.  On the back of the card I wrote my own letter to each teacher to show my love and appreciation for all their hard work.  


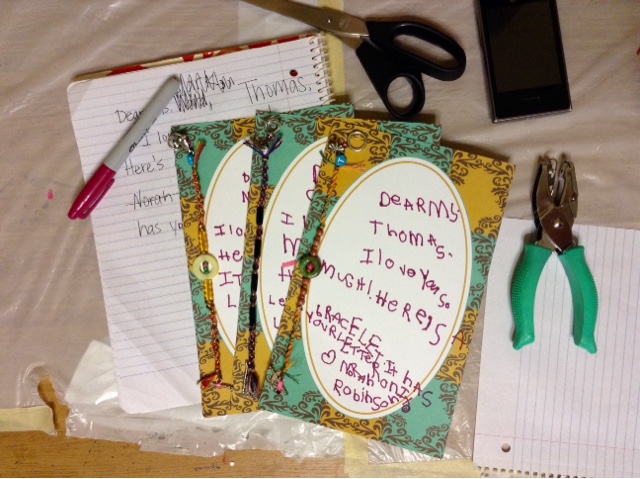
Finished Bracelets and Cards Ready to Go


N gave her teachers their gifts right before the weekend. They absolutely loved them and truly enjoyed how she personalized each one! I was truly impressed by her ability to hand write each card. It is absolutely amazing to see my child grow in every way!


Tuesday, May 26, 2015

The Cat's Pajamas

A Lesson Learned


This Memorial Day Weekend was crazy busy with family fun and spending time with friends. We kicked off the weekend with Field Day on Friday at my daughter's school.  I didn't realize that Being with a two and a half year old and a whole class of Pre-K kids could be so exhausting! Luckily nap time was waiting.  Later that evening we spent time with friends. 

The next morning we woke early to take the kids to Riverfest which consists of live music, fair food, craft booths, and lots of beer drinkers. Luckily they section off an area just for kids. N loved playing in the water pad, while B loved the sand pit.  There was a lot of things for the kids to do, but these two activities were the only things they wanted to do.  We stayed for several hours until B needed a nap.  Later that night the Hubby and I went back to see 311 play while the kids got to spent some much needed time with their grandparents. 

On Sunday, we got our stuff together and headed over to a friends house for barbecue.  We stayed until late in the evening.  N and B had a great time playing with the other kids, while the parents relaxed and had a few laughs. 

After being on the go and staying out late for three nights in a row, I was completely wiped out on Monday.  I was glad to get some down time to watch a couple of my favorite shows, New Girl and The Mindy Project.  While watching I found myself wanting all of their cute cotton pajamas they where wearing because it was a pajama kind of day.  There was an episode of New Girl where Zooey Deschanel wore a pair of parrot pajamas, and they were super cute! That is how I came to the next inspiration in my art journal.

Instead of drawing a human in pajamas, I needed something that was more temperamental. A cat comes to mind. The cat represents the feisty, sassy, and goofy mood I had off an on all weekend due to the lack of sleep and extra giggle time.  It's a delirium thing I suppose.


The Cat's Pajamas Complete!


When I started this drawing, I absolutely hated where it was going.  I felt the cats face was weird, the ears to long, and the eyes were to close together.  After feeling like there was no way I could post this on the Internet, I turned things around. There was no way I could quit or tar it out, so I stopped looking at what I didn't like about it and tried to loose myself into the pattern making.  Once I started adding patterns to the face, I was beginning to enjoy this drawing so much more. 


Left Side Face Detail


Right Side Face Detail


After filling the cats face with pattern, I began to feel as if it represented my whole weekend of having to put makeup on to go out.  I don't normally wear a lot during the week, so this was something I haven't done in a long while.  It was nice getting dolled up a little while staying in pajamas, of course.


Closeup of Pajamas


The love birds on the pajamas looked pretty rough until I continued with my pattern making. Once the love birds were complete, the rest of the pajama space looked pretty bare.  I decided to use the design of the birds' eye to repeat throughout the pajamas to add some visual repetition and texture. 


Left Side Pajama Detail


Right Side Pajama Detail


Love Birds Closeup


I learned a very valuable lesson with this drawing.  You can't give up on something in the beginning when you don't like it. Find a way to make it better, whether it's through pattern making, adding texture, color, or whatever.  Make it you and it will become AMAZING!


Thursday, May 21, 2015

Its Jelly Time!

Today I've had a terrible time getting inspired.  I guess it's just one of those days, maybe it's all the rain we've had, or the lack of sleep.  Whatever this is, I'm trying to work through it, especially through drawing. I figured this would be the best time to get out my art journal. While I was flipping through the pages I have left to complete, I came upon this page.  It had a large rectangle created at the top of the page with watercolor. Once this rectangle was created, I flipped the page sideways so that it would create a dripping effect. It made me think back to the jellyfish I saw on my Pinterest feed. This would be perfect, so I got out my pens to get started. I  really enjoyed created these linear and circular patterns within the body.  As I continue to draw, I feel my mood lift, and my inspiration coming back to life all thanks to this jellyfish.


Jellyfish Complete!

Left Body Detail


Right Body Detail

Tail Closeup


If you ever feel like life has got you down or you;re in a funk, try doing something creative.  It might be just the best medicine you've ever had!


Tuesday, May 19, 2015

Snakes Are Scary Beautiful!

Drawing My Way Through My Fear.


Within the last month or so, I've had several run-ins with nature at its finest.  The first incident happened while I was in the kitchen.  I looked out the window and was greeted by a hummingbird. He stared at me while flying in mid air. The second incident was when I was watching my kids play on the playground. While I was sitting there, three spiders landed on me at several different times. The last incident was seeing a brown baby snake curled up in the outside door of our garage.  I was a little freaked out because snakes severely scare me! I'm not sure why because I've never been attacked or anything.  This is the third snake siting I've seen in my entire life, so I'm not sure where this fear comes from.

Since I've seen this snake, I have been very paranoid about snakes lurking around every corner. So I've decided to face my fear full on and create a drawing in my art journal.  Once again I opened Google and looked up baby brown garden snake. Trying not to be freaked out by all the pictures and glaring eyes of serpents, I found one that wasn't super intimidating.

Since this was one of  the pages that was watercolored, I decided to use black pen in various sizes.  I drew the snakes outline.  Then, filled in the body with a scale-like pattern.  Finally, I decided to continue the pattern across the page and use hatch marks to create value and dimension.


Snake Complete!


Snake Head Closeup


Left Tail Detail


Right Tail Detail


Bottom Right Tail Detail


Bottom Tale Detail


Creating this drawing may not have completely helped me to overcome my fear, but I really find this snake scary beautiful! What are you afraid of?  I challenge you to take that fear and create something beautiful with it.


Monday, May 18, 2015

Walking Around In My Sleep Sack

 
The past few days we have been trying to potty train B with little luck.  The problem lies with his sleep sack.  We can't seem to get him out of it.  He would wear it all day long if he had the choice.  Its to the point where I have trouble changing him into regular clothes when it's time to pick up his Big Sis (N) from school. Even the idea of getting to play outside won't change his mind about taking off his sleep sack. 

Both of our kids really love their sleep sacks.  They both have had a sleep sack since they were born. Sadly they don't make a sleep sack for infants older than a year, so I had to get to sewing.  I made N her first sleep sack when she was eighteen months old. It was summer, so I made it out of jersey knit instead of fleece.  N has had her's ever since.  Her name is Sackie and you wouldn't dare call it a boy. She tells everyone that Sackie is her sister or best friend, and sleeps with her every night.    Over time Sackie has become mangled and dingy with lots of ripped seams.  At one point, Sackie was tied in a knot. Needless to say, Sackie has been very loved.


Sackie In All Her Glory!


B is now following in the footsteps of his Big Sis.  He loves his sleep sack, too. I guess this love has turned into a fashion statement for toddlers because both kids have worn and walked around in their sleep sacks since they could walk. This love or obsession has kept me inspired for a very long time. This inspiration has led to the next drawing entry into my art journal. Once again I used graphite pencil on acrylic. 


B in His Sleep Sack.


B in His Sleep Sack Completed!


Back of Head Closeup


Left Arm Closeup


Bottom Sleep Sack Closeup


Saturday, May 16, 2015

Prickly Pete

Where'd You Get That Cactus?!


In my last post about the owls I drew, I mentioned that this detail might look good in a circular frame. As I was uploading it to Instagram, I thought I was looking at a cactus.  I'm not sure if it was the repetitive lines or the shape, but I really sensed a cactus was in the midst. 


Owl Closeup Detail


This lead to a new idea to add to my art journal, so I got it out. Before I began to draw, I pulled up a cactus image on Google, so that I might get the correct texture. I decided to use graphite pencil again and began drawing the main body of the cactus in the right hand corner. I made this decision based on the big blue blotch made by the brayer running over the paint. The next step was to draw the right arm.  When adding these extremities, I placed them where I felt the paper spoke to me.  I know this sounds crazy, but the visual texture lead me to the placement of each part. The left arm was the last of the cactus to be added.  When I was finished with the cactus, I didn't feel quite done. Like there was something missing, so I added the bird at the last minute.  You know how it is always said, "Just stick a bird on it," well that's exactly what I did because the arm felt very perch-like.


Complete Drawing


Right Arm Detail


Main Body of the Cactus


Main Body Detail Closeup


Left Arm Closeup